As explained in the Interacting with Claim Forms topic, users are able to efficiently edit or add claim data by directly interacting with fields in the claim form. After a claim is opened and either the Institutional Claim or the Professional Claim screen displays, users can quickly determine if there are any errors in the claim that must be corrected.
Claims that contain any errors are indicated by the following:
● The “claim status header” (Refer to Claim Screen Layout topic) header displays in red with verbiage indicating to the user that: “This claim has errors that must be corrected”.
● All specific errors for the claim display in the Messages window on the right side of the claim screen (Refer to the “Claim Detail Tabs” section in Claim Screen Layout for more information about the Messages tab).
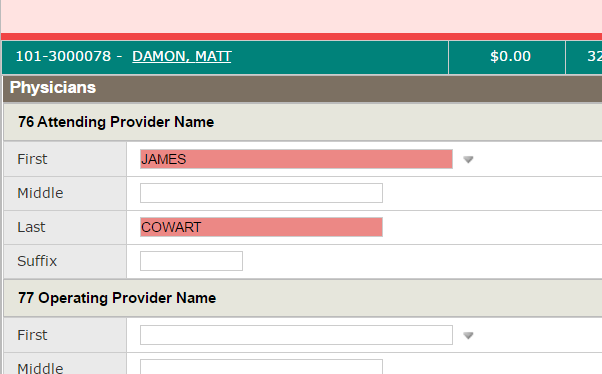
● Any individual claim fields that have triggered an error are highlighted in red within the actual claim form, as seen in the sample image.
If necessary, users can filter claims grids so that rejected claims are the only records that display in the grid. Open the Profiler menu, check the corresponding box to enable the Rejected filtering option (in the Status section), and then click Apply. Similar to other claims with errors, details about the reason that the claim has been rejected display in the Messages tab. Details for rejected claims will display under a “Payer Messages” section, as opposed to other claim details that display under the “Errors” or “Overrides” sections.
If desired, the Events and Related tabs can be used to view information regarding any acknowledgements that were sent back from the payer for the selected claim. Click Events to view the date and time the acknowledgement was received. Select the Related tab and then click the “Acknowledgement” link to view the actual acknowledgement file. If claim errors can be resolved for the rejected claim, follow steps outlined in the "General Process for Editing Claims with Errors" section (in the Resolving Errors in Claims topic) to edit the claim.