.
.
While in the Schedule Review window, you may edit a schedule for a specific employee, patient, discipline, service, office, or status:
1. Select the filters you want to use to display visits in the Schedule Review screen.
2. Click .
3. When the system displays the schedule, click  .
.
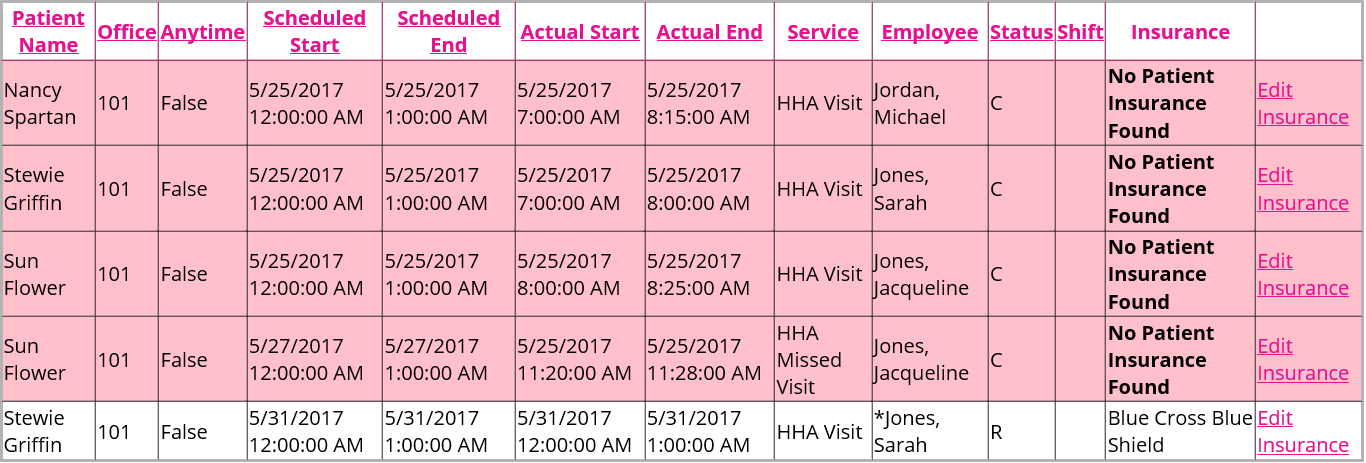
In the Schedule Update window, the system displays the current schedule. To add another item to the schedule, complete the fields below the schedule:
1. Enter the dates/times necessary.
2. Enter the Duration of the visit.
3. Click the arrows beside the Service and Patient fields to select the specific service/patient you want to add.
4. If you selected a specific patient, and that patient has more than one admission, the Admission field becomes available. Click the arrow beside this field and select the appropriate admission.
5. Use the Payor drop-down menu to choose which payor is assigned to the new schedule item.
|
|
This field is required. If you attempt to approve a charge that does not have a payor assigned, an error message will display in red and the corresponding entry will be highlighted in pink. If necessary, you can edit the insurance associated with an item in the display grid. |
6. Click the arrow beside the Employee field to select a specific employee you want to add.
7. Click  to check availability for the selected employee.
|
|
Click the Show All check box to display a list of all employees available for the patient/admission. |
8. The system displays the list of visits with the scheduled start/end dates and the employee availability. If the employee has availability for a visit, select the check box beside the visits you want to assign to the employee, and click  to apply the update to the selected items.
9. Select the applicable Office for the new schedule item.
10. Select the appropriate Status for the new item.
11. Enter any applicable Scheduling Notes.
12. When you finish, click ![]() . If applicable, a report will automatically display listing any visits that could not be released because a payor is not assigned. Users are able to print this report for convenience, so the problems can be resolved.
. If applicable, a report will automatically display listing any visits that could not be released because a payor is not assigned. Users are able to print this report for convenience, so the problems can be resolved.