To view the details of the warnings or errors:
● Click Expand/Hide All Warnings (or Errors), or click ![]() below an individual claim.
below an individual claim.
● To hide the warnings click Expand/Hide All Warnings (or Errors), or click ![]() below the claim.
below the claim.
While in the Work With Batches screen, follow the steps below to resolve errors associated with claims in a batch:
1. Expand the warnings or errors.
2. Review details for billing errors associated with a claim. To display the remedy that is needed to resolve the error, hover the mouse cursor over a specific billing error.
3. To navigate to the origin of the billing error, click the text of the error message to display the corresponding location in Enterprise Edition.
4. Correct (or enter) any necessary data, as noted in the detailed error/warning listing.
5. Click ![]() .
.
6. Click the Work With Batches tab to return to the batch.
7. After you correct an error, click Refresh to ensure that the error is resolved.
8. Repeat this process, as necessary, to resolve any remaining billing errors for all claims in the batch.
9. After you correct all the errors, click Refresh to ensure all errors are resolved.
10. If an error cannot be resolved, you can check the box in the Exclude column to ensure that the corresponding patient's data will not be included in the batch.
|
|
While addressing billing warnings, you may encounter patients which contain billing errors that cannot be resolved. This option allows users to bypass unresolved patients and still verify a batch. Any excluded patients will remain in the Work With Batches screen (after the batch is submitted) in a new batch that contains only patients that were excluded from the batch. Furthermore, any Fatal errors that are saved in a batch will be automatically excluded from a batch. |
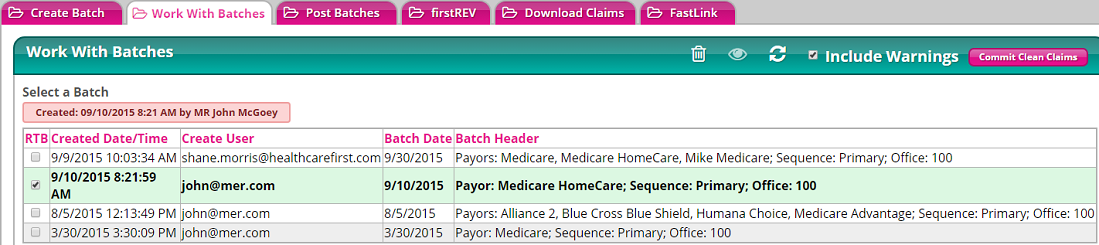
11. If the batch is ready to bill, check the box in the RTB column next to the correct batch (in the Select a Batch grid at the top of the screen). An e-mail notification will then be sent to your agency's biller.