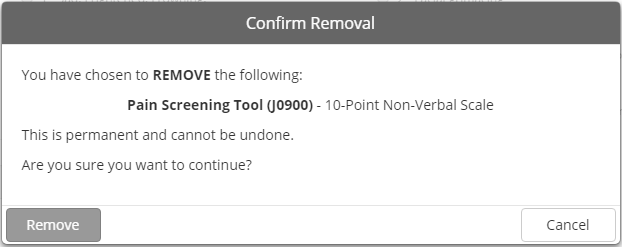
All of the enhanced documents utilize an interactive interface that allows the process of completing documents to be quick and intuitive for users. Data is entered using various fields throughout the assessment forms (i.e. text fields, date-selection calendars, radio buttons, checkboxes, drop-down menus, etc.), which the software saves automatically as users work through the document.
All data is entered within a single screen, or tab, which users can progress through by moving down as they complete each section (or select a section from the navigation menu). Interactive assessment forms are much more accessible than prior documentation as users no longer have to remember which parts of the assessment are contained in each numbered tab. Aside from the interactive format, the enhanced documents contain a variety of other useful functions, which are detailed in the following sections according to application.

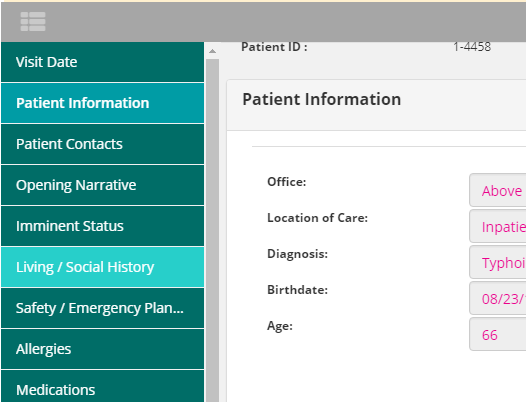
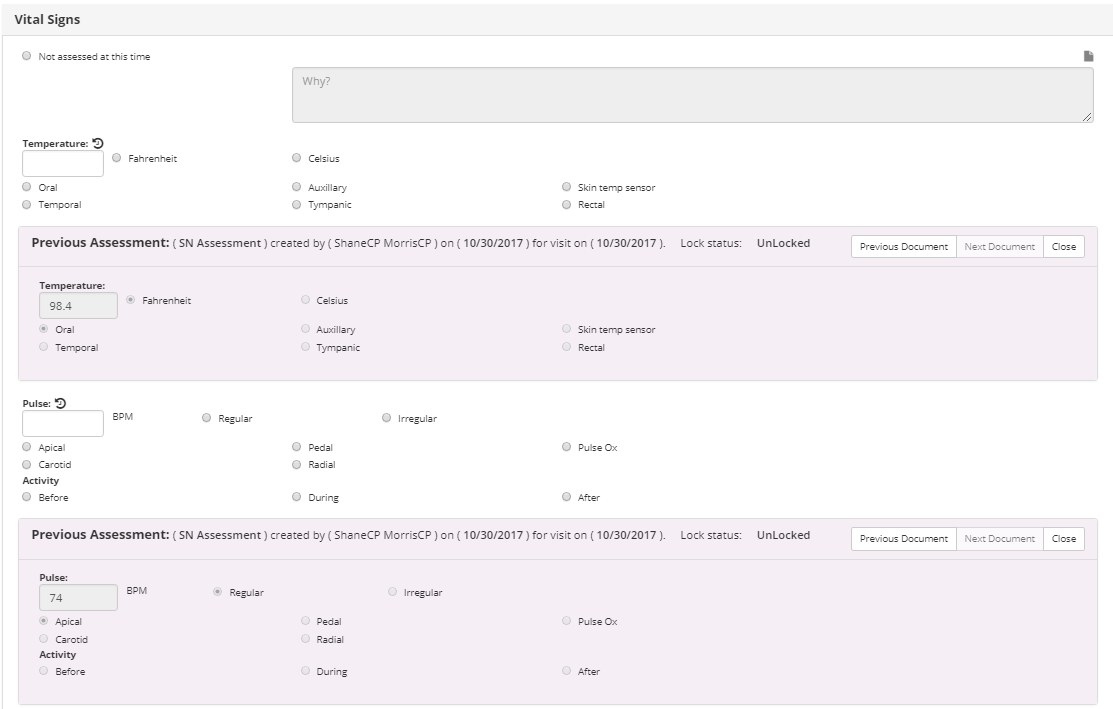
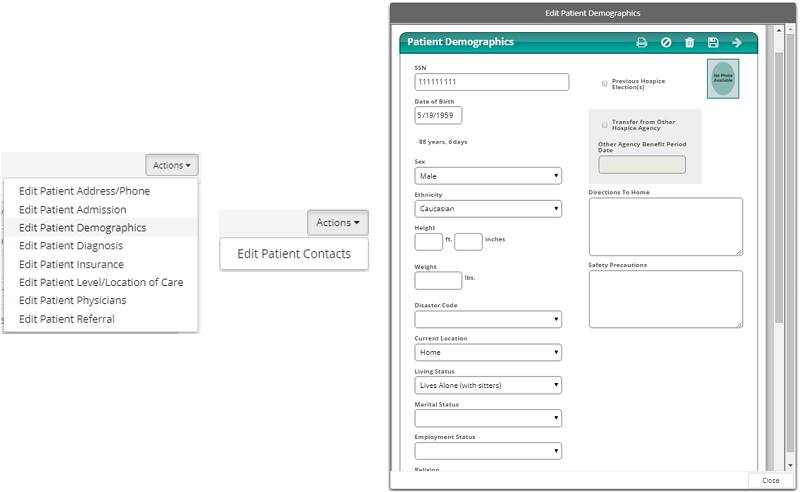
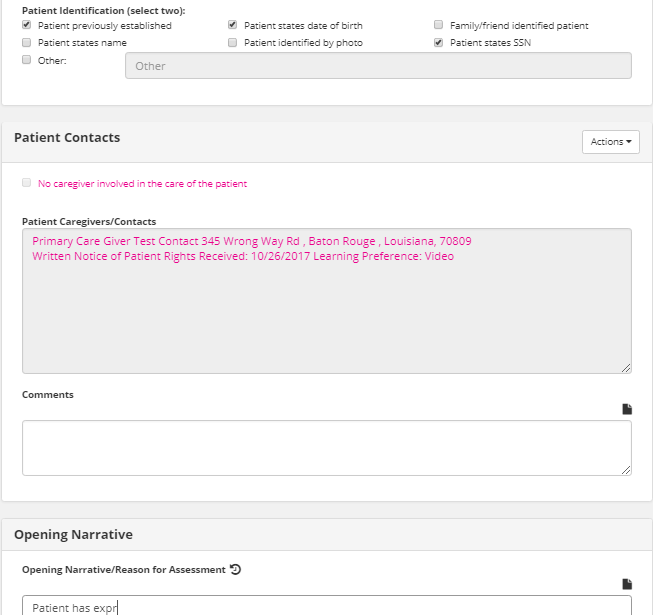
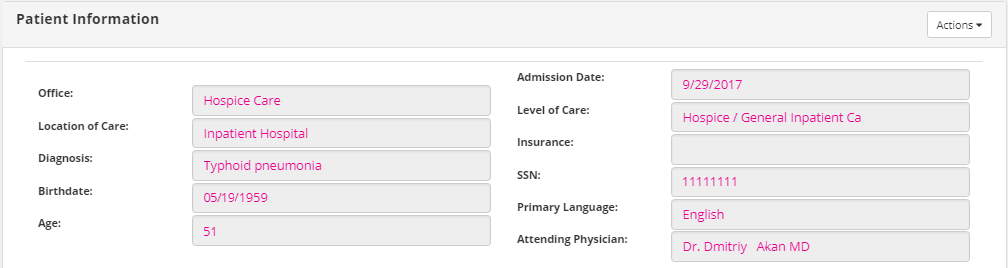
To ease the process of entering data (especially common patient details), existing information automatically populates in the corresponding fields (e.g. Patient Name, Birthdate, Diagnosis, Allergies, Patient Contacts, etc.) from the patient chart, when applicable. Patient data that synchronizes from the patient chart is indicated by pink text. This can be specific text that was entered in the patient chart, but may also include selections that have been made in certain checkbox, radio button, or drop-down fields. As shown in the sample below, the Patient Information section contains several fields often populated from information in the patient chart.

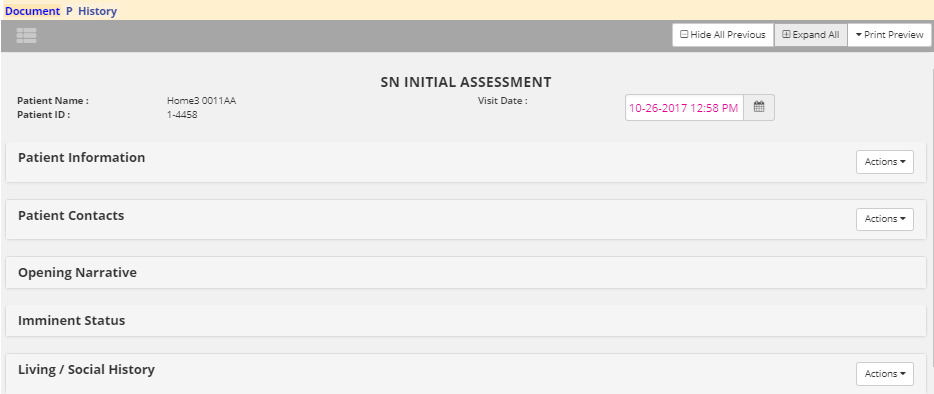
A header displays at the top of each enhanced document containing several identifying pieces of information that is associated with the document. This header includes the specific type of document that is currently open (e.g. SN Assessment, HIS - Admission, MSW Visit Note) as well as the Patient Name, Patient ID, and associated Visit Date.

As mentioned, users can easily progress through the document, but can also use the navigation feature to move directly to a specific section in the document. To display the navigation menu, click
to the top-left at any time while viewing an enhanced document. As seen in the sample image, the navigation menu will expand to display all of the sections that are available in the current document.

If necessary, users can look through a list of options to find the desired section. Navigation menu options are listed in the same order that sections are located in the document. Click the desired menu option to immediately move to the corresponding section of the document.
|
|
The menu option highlighted in blue indicates the current section is shown on screen. The menu option highlighted in teal indicates the mouse cursor is currently hovered. |
Regardless of which enhanced document is being completed, users always have the option to collapse any section of data in the document by clicking directly on the section header text (e.g. “Patient Contacts”). Additionally, users can click either
or
to perform the corresponding action on all sections in the current document. This option is merely a user preference, but this feature may allow users to more easily proceed through sections of data. This field is designed as a toggle feature, so it will either display as “Expand All” or “Collapse All”, depending on the last option that was selected.

Enhanced documents use functionality that allows agencies to obtain multiple signatures electronically (if applicable). Each signature field is unique to the document. For instance, some documents are signed and locked using existing functionality in Patients | Documents (e.g. Case Communication ), as displayed in the first sample image.

New assessment documents contain a Signature / Dates field (second image) so clinicians and patients can sign a document directly. When necessary, physicians are able to electronically sign (e.g. CTI documents) as shown in the third sample image.


Additionally, when multiple clinicians are selected in the Team Signatures section of a document (e.g. IDT Meeting ), shown in the fourth sample image, this enables the corresponding users to sign the document electronically using existing functionality in the Documents screen. The last team member to sign will then click
to lock the corresponding document.

Specialized print functionality is available via the Print Preview button located to the top right of all enhanced documents. Users should take note of each option when choosing to print enhanced documents. Depending on the option that is selected, a larger number of pages may be printed.
To avoid longer loading times and unnecessarily large document sizes, users should only print documents with sections that contain patient data. Please note the differences between the two print preview options:
● All Questions/Answers — The printed document will display the maximum number of sections available in the current enhanced document, regardless of what data was entered.
● Questions with Answers — Even if the user used every instance of the Actions field to add every available section of data (as described in “Using the Actions feature” section), the printed document will only display sections that actually contain patient data.
Located throughout all of the new documents, the historical lookback feature allows users to quickly view patient data that was entered in previous documentation for the patient (if applicable), regardless if the previous document is locked or not. This feature is available for any field of data where the historical lookback icon (
) is present.
When a user clicks
next to a field of data, a shaded Previous Assessment section displays directly below the corresponding field. This section contains any data that was entered in this field in the last document. Users can also display data for other documents (if applicable) by using the Previous Document and/or Next Document buttons. Additionally, the following information associated with the previous document displays in the section header: Name of the document, user that completed the document, date of completion, visit date, and the lock status.
The sample image shows how the Previous Assessment section displays under each of the corresponding sections of data after the user clicks the historical lookback icon (
) located next to both the Temperature and Pulse fields.

Display All Previous Assessment Sections
Users can easily choose to show (or hide) Previous Assessment sections for all applicable fields of data. Users can click either
or
to the top-right of the screen to perform the corresponding action on all historical lookback sections. This field is designed as a toggle feature, so it will either display as “Show All Previous” or “Hide All Previous”, depending on which option was clicked last.
|
|
Users cannot print or save any information in the Previous Assessment sections with the current document. This information is read-only. |
Within applicable CAREpliance documents, users can manually re-synchronize information within certain dataflow fields that are editable. The new refresh feature (
) allows users to update data as many times as needed. Once selected, users can review the new data synchronized into the field and accept or reject the newer values.
To update data in one of the applicable dataflow fields, users can simply click
(next to
the narrative icon on the right) and make the appropriate changes in the Refresh Confirmation prompt that displays.
Data currently saved in the field will display in the Would like to replace the following text field above. Users can then make the desired changes to the text within the With the text below. Simply click Ok to save the updated data in the field or click Cancel to close the prompt without saving.
|
|
This feature is only available for dataflow fields in which users can directly click and edit text. Users cannot re-synchronize data unless |
Integrated within all of the enhanced documents is the Actions field (
), which allows users to perform a variety of different actions. The options available in the Actions menu are unique to the document and the specific section in which it is located.
Each instance of the Actions field is located in the header of the associated section. While specific menu options differ in each instance of the Actions field, users are able to utilize this feature for the following general applications:
● Edit the patient chart from within the assessment, without having to leave the document and navigate away from the Documents area.
● Add new sections of data, depending on what is needed for the current patient visit.
● Remove sections of data that are no longer necessary (if applicable).
While viewing any of the enhanced documents, certain instances of the Actions field can be used to edit information in the patient chart without leaving the document screen.
The editing option is available for any section of data that has dataflow established between the patient chart and the document (e.g. DME, Admission, Insurance, Medications, Diagnosis, Demographics, Patient Contacts, etc.).
The editing options that are available in any particular instance of the Actions field are dependent upon the section where the field is located. As shown in the sample images, the Patient Information section contains numerous editing options (e.g. Patient Admission, Demographics, Insurance, etc.), but the Patient Contacts section only contains the option for editing the patient contact information.

When an option is selected, a smaller window will display the corresponding screen of the software. The sample image above shows what happens when a user selects the Edit Patient Demographics option from the Actions menu located in the Patient Information section; the Edit Patient Demographics window displays in front of the document (which is a duplicate of the screen located in Patients | Intake / Referral | Demographics). Users are able to interact with this window exactly as they do with the actual interface.
|
|
Users must click |

Some instances of the Actions field allow users to insert additional sections of the document that may be necessary for the patient assessment (e.g. Living / Social History, Brief Pain History, Endocrine, Vital Signs, ADL/IADLs, etc.). Depending on the type of document, users can insert numerous different sections of data into the document. The available options are unique to each instance of the Actions drop-down field.
Applicable sections will appear blank and the Actions field will display to the far right in the header, as highlighted by the sections shown in the sample image. Although, sometimes a section may contain both “Edit” and “Insert” options. As when editing data in the patient chart, users can simply click Actions and then select the section they want to add. After entering all appropriate data for the category, repeat this process as needed.

|
|
Users can add any section of data to a document more than once by simply repeating the process again by selecting the appropriate option from the Actions field. |
Several notable components of data are available in the Actions feature when adding sections of data to a CAREpliance document (in applicable documents):
● Pain Scales — Users can add up to 12 different pain assessment scales to a document, as many times as necessary. The following pain scales are added from Pain Screening Tool (J0900) section:
o 10-Point Non-Verbal Scale
o 10-Point Scale
o Brief Pain Inventory
o Checklist of Nonverbal Pain Indicators (CNPI)
o Edmonton Symptom Assessment System (ESAS)
o FLACC Behavioral Pain Assessment
o McGill Pain Questionnaire
o Memorial Symptom Assessment Scale
o Pain Assessment for Seniors Limited Comm (PACSLAC)
o Pain Assessment in Advanced Dementia (PAIN-AD)
o Symptom Distress Scale (McCorkie)
o Wong-Baker FACES Pain Rating Scale
● Performance Scales — Up to 7 different palliative performance scales can be added to a document, as many times as necessary. The following performance scales can be added from the Performance Scale section:
o ACC/AHA Heart Failure Stage
o ECOG Performance Scale
o FAST - Functional Assessment Staging Test
o Karnofsky Performance Scale
o Lansky Performance Scale
o NY Heart Association Functional Classification
o Palliative Performance Scale
● Assessing Patient Contacts — Located in some sections is an Additional Contact subsection (i.e. Coping / Knowledge, Anticipatory Grief ), which allows users to document assessment data for a patient contact as well. Within these subsections, users can add more Additional Contact sections in order to assess other patient contacts.
● Bereavement Assessment — Located in the Bereavement Assessment section (added to document from the Spiritual/Grief/Bereavement section) is an Assessment section, which allows users to document assessment data for bereaved caregivers. Within the Assessment subsection, users can insert additional Assessment subsections in order to assess multiple caregivers for the patient.
If a user adds a section and realizes it is not needed, it can be removed at any time by using the same Actions field.
To remove the section, click the Actions icon that is located in the header of the corresponding section and select the “Remove” option.
The remove section option is labeled according to the section (e.g. "Remove Pain Screening Tool (J0900) – 10-Point Non-Verbal Scale"). After the Confirm Removal prompt displays, click Remove.
